 Services
 Work
Work
 Company
 Blog
Blog
 Contact
By: Ilya Bo.
![]() 7 DEC 2017
7 DEC 2017
![]() 6199
6199
With the development of new technologies, the use of voice commands is now commonly available. Large companies like Apple and Google offer the opportunity to use voice commands with the help of their voice assistants, Siri and Google Now. Until recently, developers of mobile applications were not able to use the API for speech to text, or there were certain limitations when they did.
In this article, we will review and compare the most common services that are now available for speech recognition:
-
Speech recognition API
-
OpenEars
-
SpeechKit 2
-
Google Cloud Speech API
-
Yandex SpeechKit
Speech Recognition API
The release of iOS 10 introduced us to Speech Recognition API, which allows users to perform voice recognition on a par with Siri’s voice assistant. Until this point, it was not possible to use speech recognition. The standard recording of speech did not make sense when it was necessary to get more information than just text.
Speech recognition API performs speech to text by interacting with Apple servers or using local data if such an option is available.
To use the Speech Recognition API in the application:
1. Add a description of the use of speech recognition in the root .plist file by using the NSSpeechRecognitionUsageDescription and NSMicrophoneUsageDescription keys.
NSMicrophoneUsageDescription
      Your microphone will be used to record your speech when you press the "Start Recording" button.
      NSSpeechRecognitionUsageDescription
      Speech recognition will be used to determine which words you speak into this device's microphone.
2. Create an SFSpeechRecognizer object, and use the requestAuthorization(_ :) method to request the user’s permission using the sentence you added earlier in the root .plist.
SFSpeechRecognizer.requestAuthorization { authStatus in
                 /*
                     The callback may not be called on the main thread. Add an
                     operation to the main queue to update the record button's state.
                 */
                 OperationQueue.main.addOperation {
                     switch authStatus {
                         case .authorized:
      // authorized
                         case .denied:
      // denied
                         case .restricted:
      // restricted
                         case .notDetermined:
      // not determined
                     }
                 }
             }
3. After obtaining permission, use the SFSpeechURLRecognitionRequest class to recognize pre-recorded audio files, and use the SFSpeechAudioBufferRecognitionRequest class to recognize the live sound. To determine that speech recognition is available for a particular language, you must use the SFSpeechRecognizerDelegate protocol.
4. Pass the request to the SFSpeechRecognizer object to start the recognition. Speech is recognized incrementally, so the recognition handler can be called more than once. Check the value of the isFinal property, which determines that the recognition is finished.
func startRecording() throws{

             let audioSession = AVAudioSession.sharedInstance()
             try audioSession.setCategory(AVAudioSessionCategoryRecord)
             try audioSession.setMode(AVAudioSessionModeMeasurement)
             try audioSession.setActive(true, with: .notifyOthersOnDeactivation)

             let audioEngine = AVAudioEngine()
             guard let inputNode = audioEngine.inputNode else { fatalError("Audio engine has no input node") }

             let recognitionRequest = SFSpeechAudioBufferRecognitionRequest()
             // Configure request so that results are returned before audio recording is finished
             recognitionRequest.shouldReportPartialResults = true

             var recognitionTask = SFSpeechRecognitionTask()
             let speechRecognizer = SFSpeechRecognizer(locale: Locale(identifier: "en-US"))!
             // A recognition task represents a speech recognition session.
             // We keep a reference to the task so that it can be cancelled.
             recognitionTask = speechRecognizer.recognitionTask(with: recognitionRequest) { result, error in
                 var isFinal = false

                 if let result = result {
                     print(result.bestTranscription.formattedString)
                     isFinal = result.isFinal
                 }

                 if error != nil || isFinal{
                     audioEngine.stop()
                     inputNode.removeTap(onBus: 0)
                 }
             }
         }
Since Speech API is based on interaction with the server, there are some limitations:
-
Devices can be limited by the number of recognitions per day.
-
Applications can be limited globally based on the number of requests performed per day.
-
In iOS 10, the duration of audio files for recognition is limited to one minute.
OpenEars
OpenEars is an iOS framework for voice recognition and speech synthesis. It allows users to perform local speech to text in offline mode.
OpenEars works on the iPhone, iPod, and iPad and uses the open project CMU Sphinx project.
Only five languages are currently officially available. If you need to add an additional language, you can download a specific language model and adjust the application accordingly.
The selected language model may not be tested for the AppStore. More on this topic can be found here.
Also available for this service are several paid plug-ins that allow for the improvement of recognition accuracy and increased productivity.
To use OpenEars in the application:
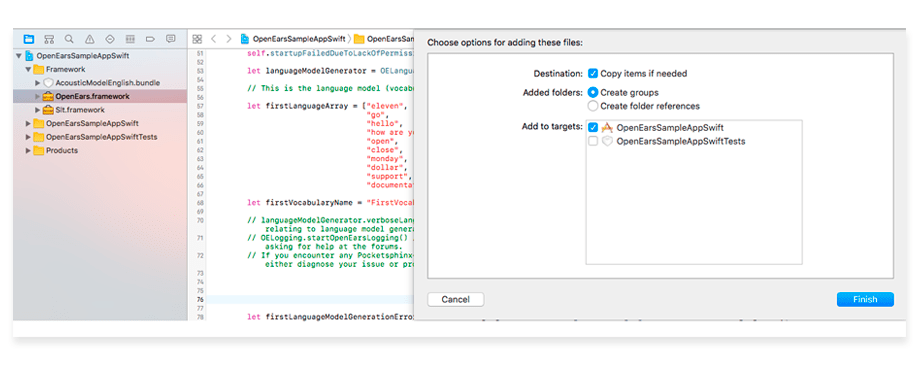
1. Download and add the OpenEars framework to the Frameworks directory. Make sure that the “Create groups” and “Copy items if needed” options are selected.
2. You also need to add the AudioToolbox and AVFoundation frameworks. In the project settings, select your target, and then go to the Build Phases tab. Select AudioToolbox and AVFoundation.

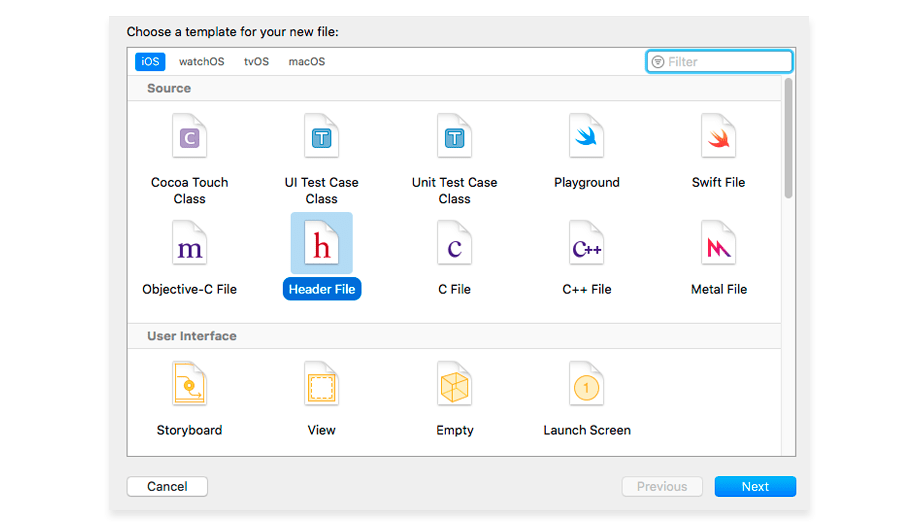
3. Create a bridging header (File → New → File → Header File). You can name this file OpenEarsHeader.h.
4. Import the OpenEars libraries into the bridging header.
#ifndef OpenEarsHeader_h
      #define OpenEarsHeader_h
      #import <OpenEars/OEPocketsphinxController.h>
      #import <OpenEars/OELanguageModelGenerator.h>
      #import <OpenEars/OEFliteController.h>
      #import <Slt/Slt.h>
      #import <OpenEars/OEEventsObserver.h>
      #import <OpenEars/OELogging.h>
      #import <OpenEars/OEAcousticModel.h>
      #endif /* OpenEarsHeader_h */
5. Next, in Build Settings, find the “Objective-C Bridging Header” setting, and enter the path to your bridging header file.

6. To recognize speech in offline mode, you need to define a dictionary that will be used in the application. The recommended dictionary size is between 10 and 1000 words.
let languageModelGenerator = OELanguageModelGenerator()

             // This is the language model (vocabulary) we're going to start up with. You can replace these words with the words you want to use.

             let firstLanguageArray = ["eleven",
                                       "go",
                                       "hello",
                                       "how are you",
                                       "open",
                                       "close",
                                       "monday",
                                       "dollar",
                                       "support",
                                       "documentation"]

             let firstVocabularyName = "FirstVocabulary"

             let firstLanguageModelGenerationError: Error! = languageModelGenerator.generateLanguageModel(from: firstLanguageArray, withFilesNamed: firstVocabularyName, forAcousticModelAtPath: OEAcousticModel.path(toModel: "AcousticModelEnglish")) // Change "AcousticModelEnglish" to "AcousticModelSpanish" in order to create a language model for Spanish recognition instead of English.
7. The OEPocketsphinxController class is responsible for recognition. It can install a language and acoustic model.
// OELogging.startOpenEarsLogging() //Uncomment to receive full OpenEars logging in case of any unexpected results.
                     do {
                         try OEPocketsphinxController.sharedInstance().setActive(true) // Setting the shared OEPocketsphinxController active is necessary before any of its properties are accessed.
                     } catch {
                         print("Error: it wasn't possible to set the shared instance to active: "(error)"")
                     }

      OEPocketsphinxController.sharedInstance().startListeningWithLanguageModel(atPath: lmPath, dictionaryAtPath: dicPath, acousticModelAtPath: OEAcousticModel.path(toModel: "AcousticModelEnglish"), languageModelIsJSGF: false)
8. The OEEventsObserver class maintains constant status updates for the listening session. From this, we get information about the recognized speech and various versions of words and sentences
var openEarsEventsObserver = OEEventsObserver()
      openEarsEventsObserver.delegate = self
The main disadvantage of this framework is the low accuracy of speech recognition in comparison with similar services (Google, Yandex, SpeechKit 2) as well as the complexity of customization (adding a language model).
The plus is the ability for offline work.
SpeechKit 2
SpeechKit is a cross-platform service that allows users to integrate voice recognition capabilities into the application by using Nuance cloud services.
Voice recognition is available in more than 40 languages (including Russian and Ukrainian).
The minimum version is iOS 6.1.
The main concept with SpeechKit is that all operations are transferred using the Session object. SKSession offers a permanent connection to the Nuance server. Using SKSession, you can create several SKTransactions, and these transactions can be performed in parallel.
To use SpeechKit in the application:
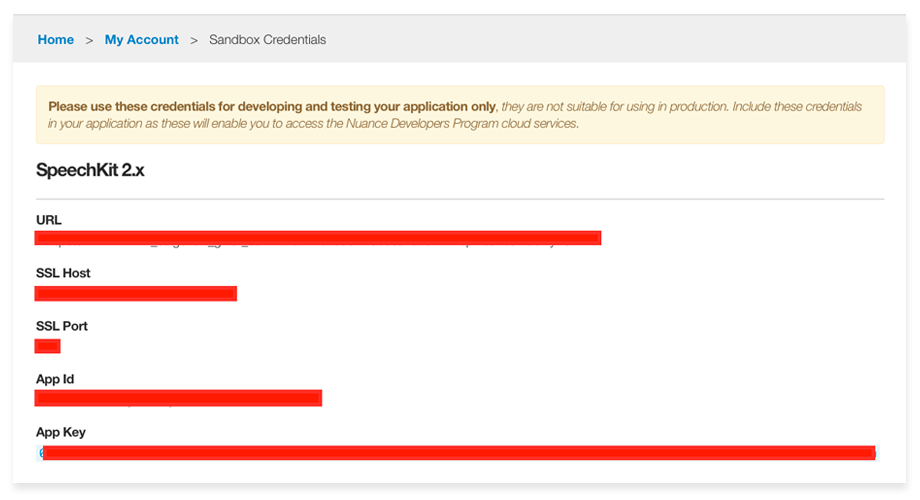
1. Create an account at the Nuance Developers portal.
2. Next, use SKSAppKey, SKSAppId, SKSServerHost, or SKSServerPort from the Nuance Developers account page. During development, you must use the sandbox data that is available from the “My Sandbox” section. When you are ready to go into production, you can create a new application on the account page (“Create a New App”). This action will create the appropriate keys for the production, which you must add to the project before sending it to be reviewed in Nuance. After checking the application, you will then need to activate your account using the appropriate payment model.
3. Add the SpeechKit framework to the project. It is available on CocoaPods.
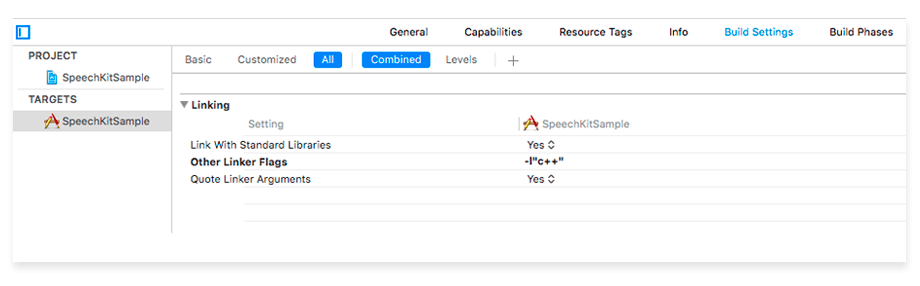
4. Open “Build Settings” in the project; then click on “Other Linker Flags” and add -l “C ++.”
5. Next, using the keys obtained earlier, configure SKSession and SKTransaction. Using the methods offered by the SKTransaction delegate, it interacts with the server and processes speech recognition
let skSession = SKSession(url: URL(string: SKSServerUrl), appToken: SKSAppKey)
      let recognitionType = SKTransactionSpeechTypeDictation
      let endpointer : SKTransactionEndOfSpeechDetection = .short
              let language = "eng-USA"
      let skTransaction = skSession!.recognize(withType: recognitionType,
                                                         detection: endpointer,
                                                         language: language,
                                                         options: nil,
                                                         delegate: self)
There are some limitations. More information can be found here.
Sandbox
-
Maximum transactions per day – 500
-
Maximum of concurrent transactions per day – 2
Production
-
Maximum free transactions per month – 20,000
-
Maximum number of dictionaries – 40
-
Maximum number of phrases – 200
The advantage of this service is relatively high recognition accuracy. Disadvantages include restrictions on requests and dictionaries as well as the need to choose a paid model.
Google Cloud Speech API
Google Cloud Speech API allows users to recognize more than 80 languages in a specific context. At the core of the service lies machine learning in the Google Cloud. Speech API can be used on all devices that can send REST or gRPC requests.
The minimum version is iOS 8+.
To use the Google Speech API in the application, follow these steps:
1. In the Cloud Platform Console, open the Projects page and select or create a new project.
2. Next, you will need to configure the project in the Google console. Step-by-step instructions can be found here.
3. The next step is to set up an account for this service. Learn how to set up the Cloud Speech API here. When you follow these steps, you will receive the account key for the service (JSON) as well as the data for the variable GOOGLE_APPLICATION_CREDENTIALS, which will allow you to interact with the Speech API.
4. Since there is not currently an official SDK for iOS, developers have to rely on examples of implementation from both the official site and from the other sources.
You can use this service both for previously recorded audio files and for real-time recognition. Speech recognition is free for an audio file longer than one minute.
Currently, Google Cloud Speech API is one of the most accurate voice recognition services available. The main drawbacks are the little-developed API (currently in the beta version) as well as the lack of an official SDK for iOS. Despite this, a demo project for iOS is available on the official site, and there are several third-party libraries from independent developers as well.
Yandex SpeechKit
Yandex SpeechKit Mobile SDK is a multiplatform library that allows users to add the capabilities of Yandex speech technologies to mobile applications for iOS, Android, and Windows Phones.
For the basic version, the query limit is 10,000 per day. Speech recognition is available only in Russian, English, Ukrainian, and Turkish. Standard language models are available: short queries, texts, addresses, music, dates, names, numbers, orders. If the query is not clear, the system returns XML with several recognition options.
In addition, you can mark a custom graphical interface for speech recognition, which is available by default.
The minimum version is iOS 6+.
To use Yandex SpeechKit in the application:
1. Register in the developer’s cabinet and get the API key for the chosen technology (in our case, SpeechKit Mobile SDK).
2. Add the YandexSpeechKit framework to the project using cocoapods: pod “YandexSpeechKit”.
3. Connect the library header file: #import <YandexSpeechKit/SpeechKit.h>
4. Send a message to the -configureWithAPIKey method: of the YSKSpeechKit class, passing the value of the API key: [[YSKSpeechKit sharedInstance] configureWithAPIKey:@"API-key"];
5. Create an object of class YSKSpeechRecognitionViewController, install the delegate, and display the controller:
var recognizer: YSKRecognizer?
      var recognition: YSKRecognition?

         var recognizerLanguage: String? // YSKRecognitionLanguageRussian
         var recognizerModel: String? // YSKRecognitionModelGeneral
      // Create new YSKRecognizer instance for every request.
             recognizer = YSKRecognizer(language: recognizerLanguage, model: recognizerModel)
             recognizer?.delegate = self
             recognizer?.isVADEnabled = true

             // Cleanup previouse result.
             recognition = nil;
             // Start recognition.
             recognizer?.start()
6. Use delegate methods to process speech recognition results:
func recognizer(_ recognizer: YSKRecognizer!, didReceivePartialResults results: YSKRecognition!, withEndOfUtterance endOfUtterance: Bool) {
             recognition = results
         }

      func recognizer(_ recognizer: YSKRecognizer!, didCompleteWithResults results: YSKRecognition!) {
             recognition = results

             self.recognizer = nil;
         }
      …
The main advantages of this system are the high quality of recognition, the choice of language model, and the options available for recognized speech.
The disadvantage in comparison with other systems is the limitation of only four languages.
Conclusion
The following tables summarize the speech recognition services:
Speech recognition API (native iOS)
iOS version |
iOS 10+ |
|---|---|
Requires Internet connection |
Usually requires an Internet connection (except some languages and device models) |
Implementation |
It is native API. No configuration except It is native API. No configuration except NSSpeechRecognitionUsageDescription key in Info.plist needed. |
Limitations |
Requests per application / device limitation. 1 minute max audio file size. |
Languages |
You can use the supportedLocales() method to get a list of supported locales. A locale can be supported, but the speech recognizer can be unavailable. For example, some locales require an Internet connection to use a speech recognizer. |
Recognition accuracy *( Simple set of words and phrases has been taken) ["eleven", "go", "hello", "how are you", "open", "close", "monday", "dollar", "support", "documentation"] |
6/10 |
OpenEars framework
iOS version |
iOS 5.1.1+ |
|---|---|
Requires Internet connection |
- |
Implementation |
Need to add OpenEars.framework to the project. |
Limitations |
Phrases dictionary is limited – more words in dictionary harder to process. Not stable – stops recognizing time-to-time. |
Languages |
English, Chinese, French, Spanish, German. Others understood to be incompatible with AppStore. |
Recognition accuracy *( Simple set of words and phrases has been taken) ["eleven", "go", "hello", "how are you", "open", "close", "monday", "dollar", "support", "documentation"] |
5/10 |
Google speech API
iOS version |
iOS 8+ |
|---|---|
Requires Internet connection |
+ |
Implementation |
Need to create an application in Google console. |
Limitations |
There is no iOS SDK, but third-party solutions exist, and an official demo for iOS from Google has been created. Synchronous / Asynchronous audio file size per request. Phrases per request. Request per day/seconds. |
Languages |
The API recognizes over 80 languages and variants. |
Recognition accuracy *( Simple set of words and phrases has been taken) ["eleven", "go", "hello", "how are you", "open", "close", "monday", "dollar", "support", "documentation"] |
9/10 |
SpeechKit 2 (Nuance)
iOS version |
iOS 6.1+ |
|---|---|
Requires Internet connection |
+ |
Implementation |
Create and configure an application in Nuance developer console. |
Limitations |
Limitations on max devices and max transactions per day. Sandbox and production limits are different. |
Languages |
40+ languages (Russian & Ukrainian available). |
Recognition accuracy *( Simple set of words and phrases has been taken) ["eleven", "go", "hello", "how are you", "open", "close", "monday", "dollar", "support", "documentation"] |
8/10 |
Yandex SpeechKit
iOS version |
iOS 6+ |
|---|---|
Requires Internet connection |
+ |
Implementation |
Get an API-key and added YandexSpeechKit framework to the project. |
Limitations |
Requests per day and max language models limitations. |
Languages |
4 languages: Russian, English, Ukrainian,Turkish. |
Recognition accuracy *( Simple set of words and phrases has been taken) ["eleven", "go", "hello", "how are you", "open", "close", "monday", "dollar", "support", "documentation"] |
9/10 |
To compare the accuracy of speech to text, a simple set of 10 words and phrases was defined first. The table indicates how many of these were correctly recognized. The most accurate services were Google and Yandex. The main disadvantage of the Yandex service in comparison with Google is the limitation of only four available languages. At the same time, it should also be noted that Yandex SpeechKit is simpler in implementation thanks to the iOS SDK.
Speech API from Apple has a number of key limitations that do not allow users to consider this service for use with real projects.
These limitations include the minimum version of iOS 10 as well as low recognition accuracy compared to similar services from Google and Yandex. Since native Speech API has only come out relatively recently, most likely in the future we will see an update of this functionality and the expansion of its capabilities.
Speech Kit 2 (Nuance) has a high accuracy when it comes to recognition, and the main problem is the fee charged for the provision of services. After reaching a certain limit of requests, you will then have to pay for the subsequent use of services, even with the basic payment model.
The OpenEars framework, whose main advantage is offline work, shows fewer good results in terms of speech recognition accuracy.
In this article, you have read about the best voice recognition services currently available. Which service to use depends on the features of the application being developed (working offline, working with a specific language, the number of requests, and their formats).


